How to Fix Windows 10 High CPU Usage?
Welcome to your DnTech blog. So in this article today we are going to learn about How to Fix Windows 10 High CPU Usage. So we will know all these things in this article. So stay in this article and know more details.
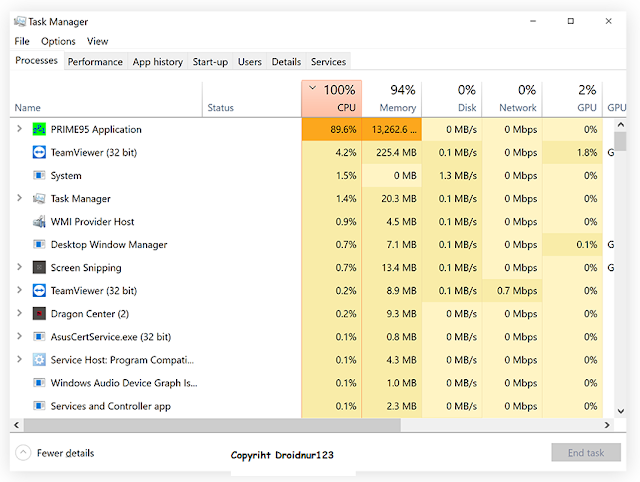
if you are using Windows 10 Desktop or Laptop and Your Cpu Use above 50% Or 100%, This is a problem that can shorten the life of your CPU, and your computer will be abnormal.
So in this post, I will show you who it is for and how I can fix it. First of all, there are two reasons for this to come.
1. Your computer may have been attacked by a virus.
2. or any Windows file has been corrupted
Looks like I pointed out two or three straight steps and you got it right. But the matter is not so straightforward because there may be a lot of problems in it which I will say 16-17 steps to fix. If you follow these, the problem will be fixed 100%.
Important notice
Restart is recommended after each step.
First Step:
Upgrade to Windows first, because if there is a problem then Windows will try to fix it automatically by downloading the software driver etc. If you encounter any problems while upgrading. You can see the easy step by step guide by clicking here
The next step
is to install the antivirus. I would recommend 1 install Quik heal antivirus or Kaspersky antivirus because both have a one-month free trial you install.
If you do a full scan of your hard disk using a 1 month trial period, it will fix any virus-related problems.
Step 3
Now you need to turn off the notification of your windows. Speaking of notifications, Rocky said that it is important to turn off many more options.
It is important to turn off many more options in your Windows.
Step 4Now you need to set the best performance mode setting on the computer. For that, You Need To Click On > Start Button > And Search for >System Click on it > Then Click Advance System Setting > Click On Setting Under Performance Option > adjust For Best Performance, Second One Not First One.
1. dism /online /cleanup-image /checkhealth2. dism /online /cleanup-image /scanhealth3. dism /online /cleanup-image /restorehealth4. dism /online /cleanup-image /restorehealth /Source:C:RepairSourceWindows /LimitAccess5. sfc /scannowStep 10
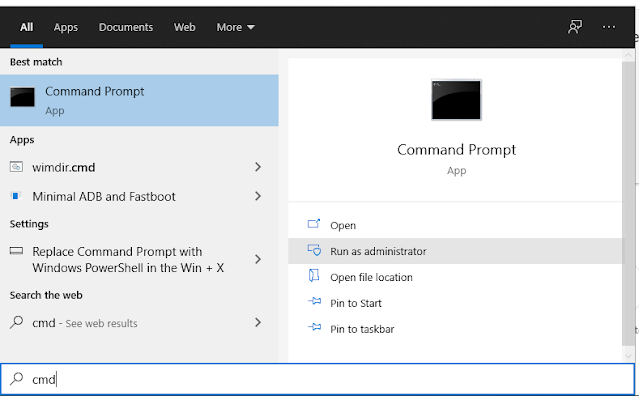
In the next step, we need to open Windows Power Shell. To open it, type windows power shell in the search bar and click on run as administrator
1. PowerCfg /SETACVALUEINDEX SCHEME_CURRENT SUB_PROCESSOR IDLEDISABLE 000
2. PowerCfg /SETACTIVE SCHEME_CURRENT
Step 11
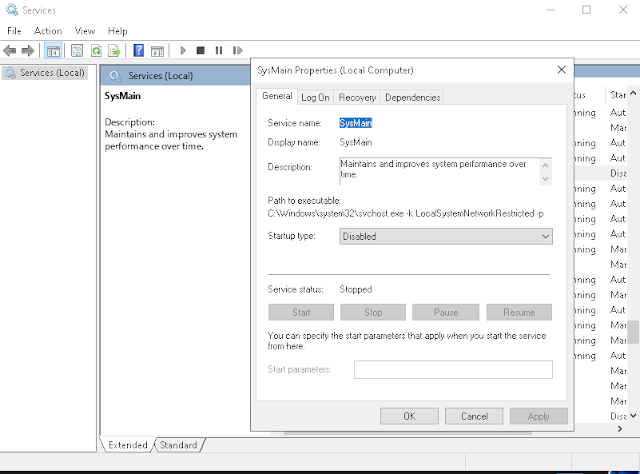
In the next step, we will close some background services of Windows. For that, you have to type Services in Search and click on Enter. Then double click Background Intelligent Transfer Services. Disable the Startup Type option. Then you have to click on Appy Then Click on Stop
Also, Search for SysMain, Windows Search, and Flow The Previous Step. And right-click on this Windows Management Instrumentation option and click on the Restart option. And let me remind you once again that your problem may have been fixed.
step 12
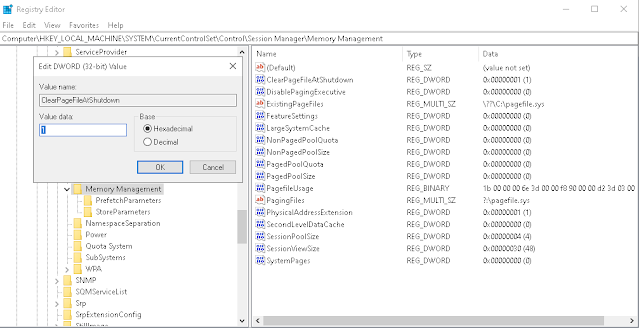
Now we will open the Regidtry Editor by typing the registry editor in the search and after opening the run As Administrator > HKEY _LOCAL _M ....> System> CurrentContrlSet> Control> Session Manager> Memory Management> ClearPageFileAtShutdown dubble Click it Remove 0 Replace 1 and click OK
step 13
In the next step, we need to uninstall the unwanted programs. For that, you have to go to the >control panel by clicking on the >start button and click on the >program end feature. Then need to uninstall the program.
Many people's windows are slow because their hardware is very old maybe in 2009. So the hardware is old and installs the latest version of the software which does not make the hardware and software work which causes the computer to slow down. Or I have seen many times that the antivirus is installed on the old computer which is running in the background which causes Windows to slow down. If there is anything like this, uninstall it. By now, maybe your problem is fixed. If not click here for Hor to format or reset windows in detail step by step.
Thanx For reading This Article.
